
Hello friends!! First off – CONGRATS! If you’re reading this there’s a pretty good chance you’re planning your wedding & honestly I couldn’t be happier for you. No really, even if we haven’t met – I’m raising a glass to you & your happiness.
I’m fortunate enough to have found my person to do life with so I know that it’s truly the biggest gift on earth. It means not having to face anything alone, it means your hard days are a bit more bearable & your best days are even better. So yeah, I’m over the moon that you’ve found your someone & are making this amazing commitment. *P.s. – when those stressful moments of wedding planning creep up on you – it helps if you can remember that this is what its all about – you’re marrying your best friend!
Ok, let’s talk timelines!
- Start with what you know
Sounds simple enough right? The logical place to begin mapping out your day is with the plans you’ve already made. Usually the first details you’ll be deciding on is ceremony start time, reception start time, and reception end time. Find out how early you’re venue allows you to start setting up and when they expect you to wrap up the celebration. Writing out these details will set up the framework for the rest of the day.
2. Work backwards and forwards from your ceremony time
When you’ve nailed down the key elements of your day, then you can work backwards & forwards from there to fill in the gaps in the schedule. Consider all the different elements taking place on your wedding day & estimate how long each will take. If you’re unsure how much time to budget for various things – ask your vendors! They are the experts & should be able to help you budget your time accordingly.
Working backwards & forwards from your ceremony time is the easiest way to build the rest of your schedule. For instance, if you’re planning a 30min ceremony starting at 4pm, that means you can plan on a 4:30-5:30pm cocktail hour, and a reception start time around 6pm.
Same method applies for before the ceremony. Let’s say you want to plan for 30min of chill time to hide away while your guests arrive. That means you need to have wrapped up any pre-ceremony photos by 3:30pm. You might be doing a first look so you can get most of the photos done before the ceremony & celebration.
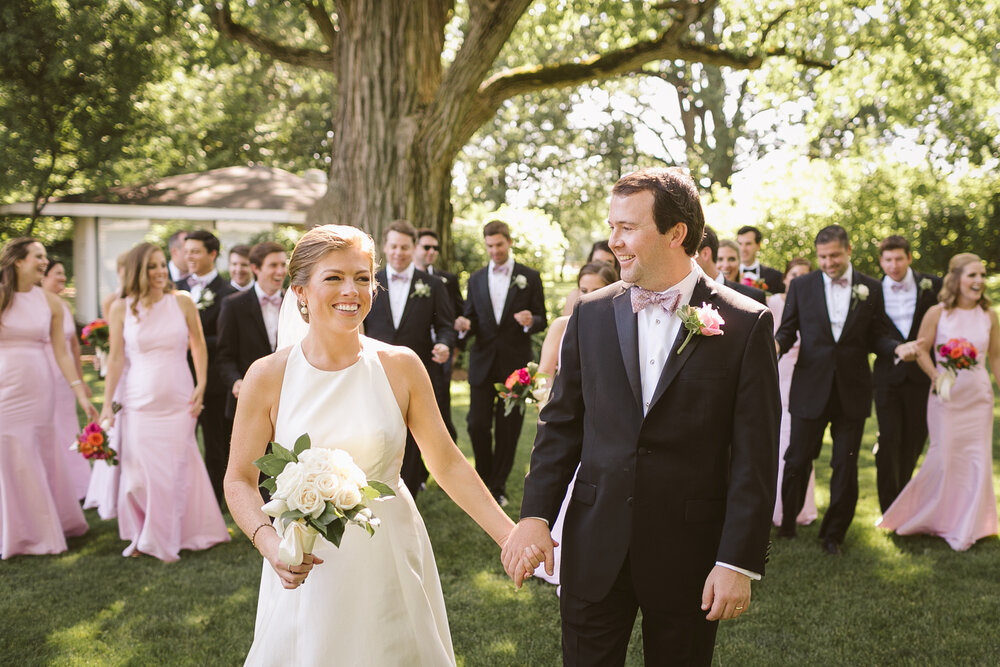
I’d recommend allowing for 1.5-2 hours for a first look, couple portraits, wedding party (individuals & group), & immediate family formals. That means everyone needs to be dressed & ready for photos by 1:30 or 2pm! (more wiggle room is always better on a wedding day)
3. Don’t forget your vendors!
Depending on your preference – you should add vendor info. to your timeline OR make a separate vendor timeline. Photography should definitely be on your main timeline – because it requires your presence! But there are a lot of vendor tasks that won’t necessarily involve you on the wedding day, such as set up times for your florist, DJ, and so on. Consult with your vendors about timing & tasks they will be in charge of.
4. Get Specific
Ok, now that we have an overall view of your day – it’s time to get specific. It might sound like overkill, but honestly – the more detailed you can get means there’s less left to chance on the big day. If you’re working with a planner they will definitely be able to help with this. If you’re a DIY couple – make sure you get very detailed with your instructions & have a day-of-coordinator to execute your plans. Meet up with them & go through all your notes. (That’s what I did!)
Clarify the tasks that need to be done, who’s responsible for each task, and when it needs to happen. This will likely involve your vendors & maybe even some family & friends. For example, we asked one of my mom’s best friends to set up the memorial photos at our wedding. We had to communicate to her where she should set that up & when. That went on the master timeline!
5. Share your timeline
Now it’s time to get this in the right hands! Share your timeline with all your vendors, your wedding party, and any family or friends that you’ve delegated tasks to. Be sure to include contact info. for everyone so your vendors can get in touch with each other if they need to. It’s important that everyone has the same copy of your timeline, make sure you update your vendors with any last-minute changes.
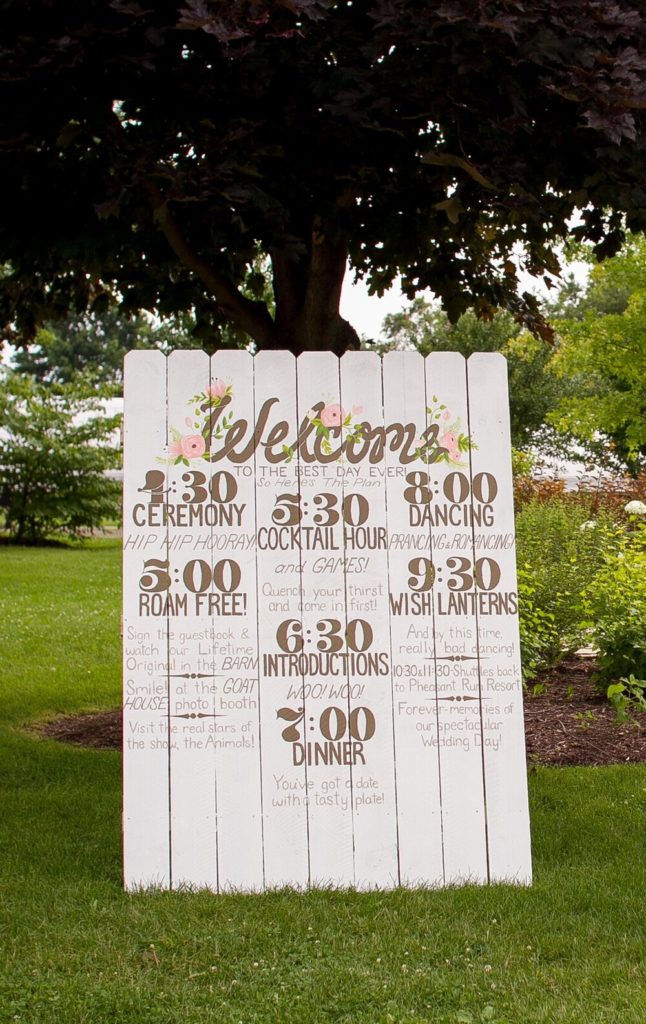
Timeline tips
- Try to finalize your timeline & share it with your vendors 2-3 weeks before your wedding date. This allows them time to give you feedback if they see something that might need adjusting.
- Make sure your timeline is clear & easy to understand. Be as succinct as possible, but even if there is a lot of info – you can tidy things up with color-coding or bullet points.
- Allow extra time! Factor in travel between locations & leave a lot of wiggle room. Better to have extra time to relax & enjoy your day rather than be rushed & stressed.
Hopefully this helps you map out the best day ever! I provide sample timelines for my KKP couples in my wedding guide & I’m more than happy to hop on a call to help you plan your day!


